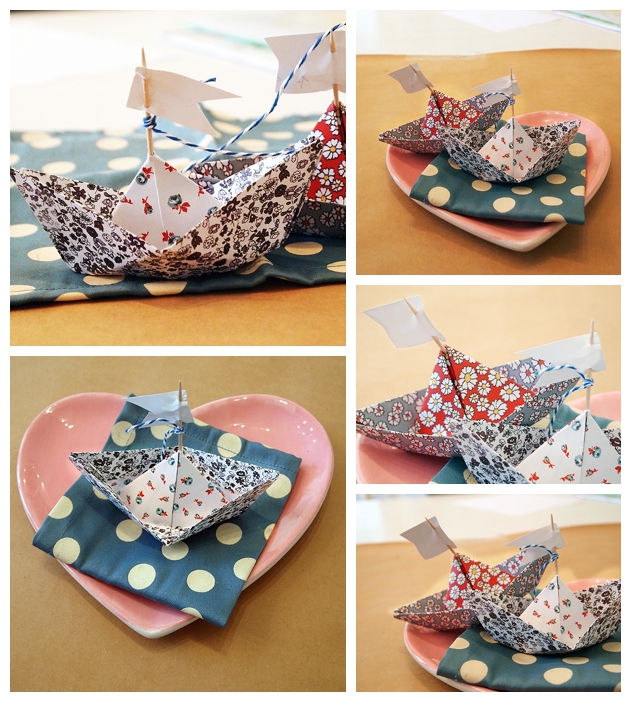
Set a seaworthy table with these nautical namecards whose sails designate your guests’ seats. Great for a children’s table or rehearsal dinners, these whimsical place cards require little more than a simple folding technique. Outfit boats with Life Savers candies and cast them adrift on blue napkins or tablecloths. No guest will leave feeling crabby if you pair these cute mini name cards with custom crab mallets!
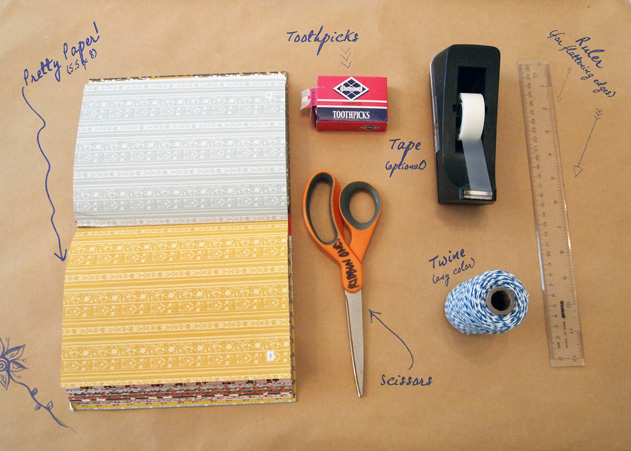
What you will Need:
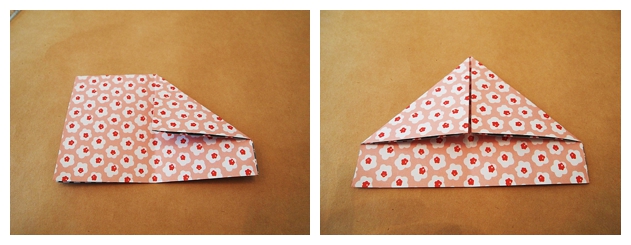
1. Pretty Paper (8×5.5)
ours has a different pattern on each side
2. toothpicks
3. ruler (for flattening edges)
4. scissors
5. twine
6. tape (optional)
7. regular white paper
DIY:
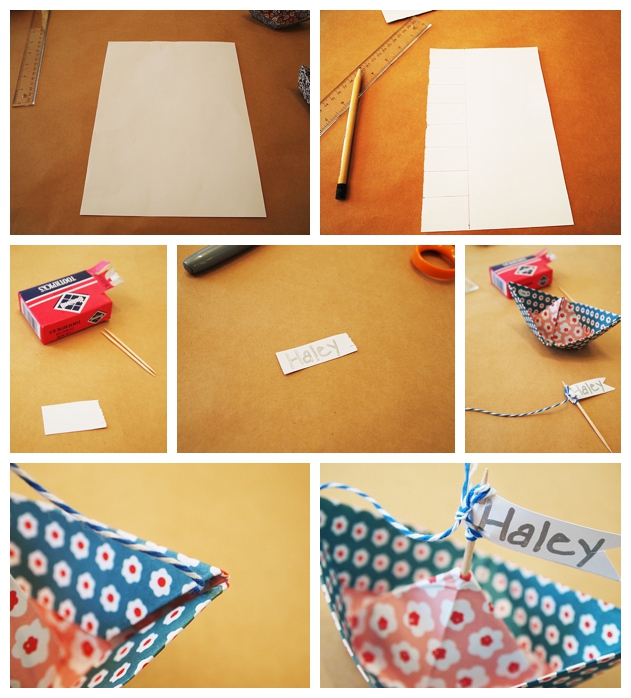
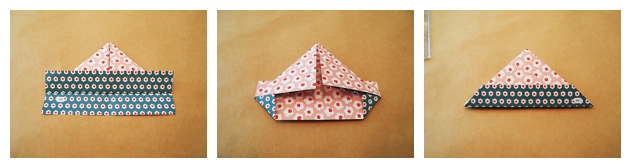
1. Fold a 8.5 x 5.5 piece of paper in half, top to bottom. The fold should be “hamburger-style.”
2. Make a vertical crease, and unfold. After you’ve folded the paper in half horizontally, fold it in half vertically. Unfold the vertical fold so that you’re left with a crease showing you where the center of the paper is.
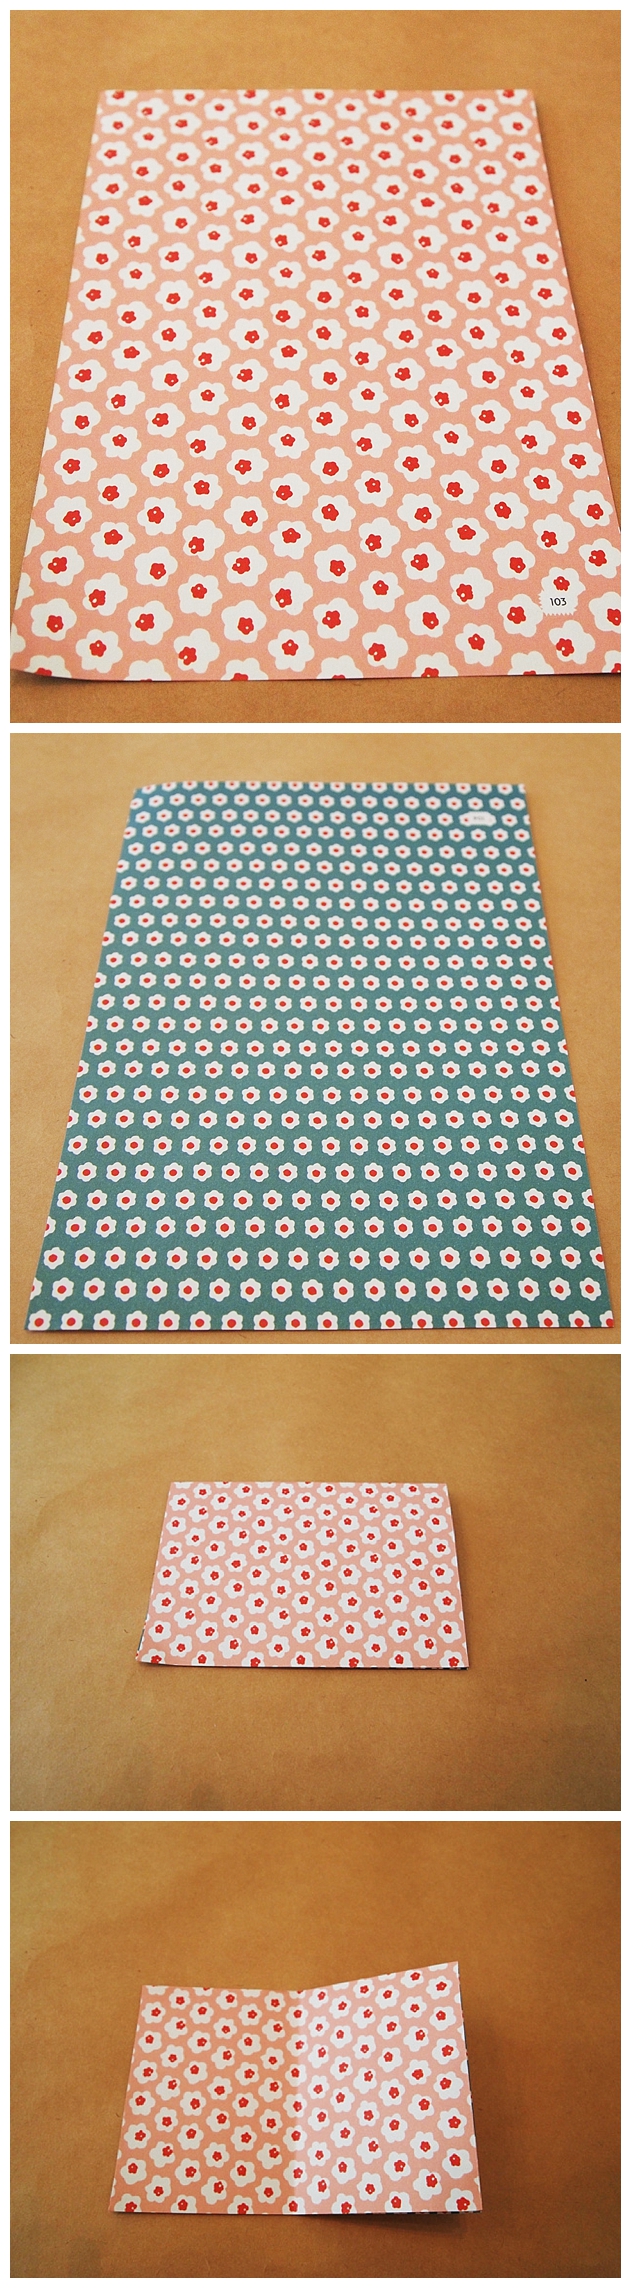
3. Fold down the top corners. Grab the two top corners, and fold down so that they line up with the center crease.
4. Fold the bottom of the paper up against both sides. Grab the top flap at the bottom of the paper, and fold it up against the bottom of the triangle. Fold the paper over, and do the same thing to the bottom flap on that side.
5. Fold the bottom corners in. On one side of the paper, grab the corners of the rectangle that are sticking out over the triangle. Fold them in around the edge of the triangle. Flip the paper over, and do the same thing on the other side.
6. Make the triangle into a square. Use your fingers to open up the bottom of the triangle. It should naturally start to pop into a square shape, so that what were once the bottom corners of the triangle fold over each other and become the bottom corner of a diamond.
7. Fold up the bottom flaps. Arrange your paper so that the bottom points of the diamond can fold upward. Fold up one corner, aligning it with the top corner. Flip the paper over, and do the same thing to the other side.
8. Make the triangle into a square again. Like you did last time, open up the bottom of your new triangle with your fingers. The bottom corners will line up to become the bottom point of a square diamond.
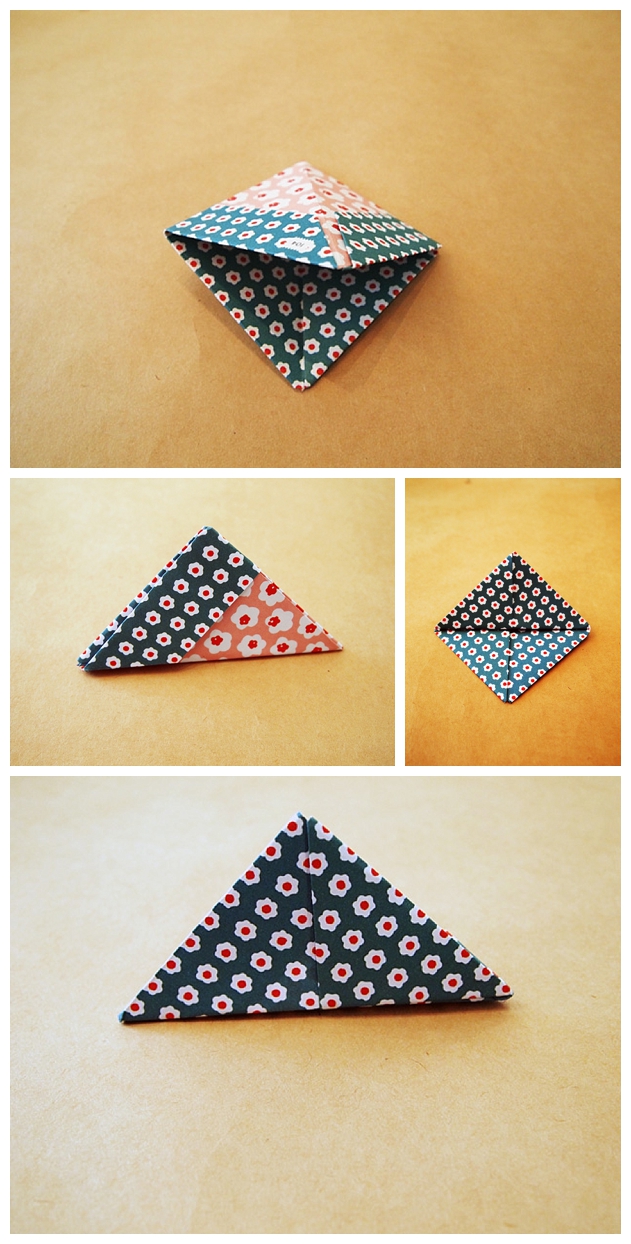
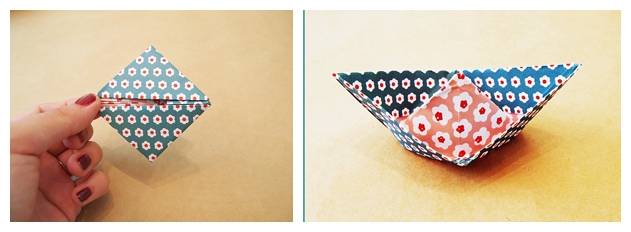
9. Pull out the triangles on the side of the square. Start at the top of the diamond, and gently pull the two sides apart so that the seam running down the middle of the diamond opens. You now have your basic boat.
10. Shape your boat. Use your fingers to smooth out the sides or any parts of the boat that may be acting finicky.
11. Set boat aside. Write name on white paper; cut into a pennant shape.Use your judgement for size on this step. Poke two small holes in your pennant shaped paper with a toothpick and tie top part of twine to tooth pick leaving a tail of twine.(should look like a mini mast)
12. Poke bottom piece of toothpick through tip of sailboat.Tuck end of twine into front fold of boat.
13. Enjoy your cute mini sailboat place card!